Treasuring The Journey

Treasuring the journey through life, one footstep at a time.

Embroidery Hoop Décor August 1, 2011

I am so excited to finally be able to share this craft project that has been a long time in the making. 


011


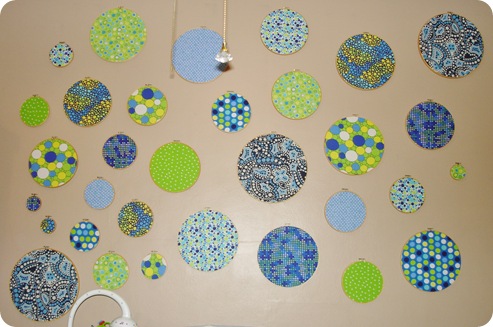
Last fall I came across about 18 various sized embroidery hoops at Habitat Re-Store.  I did not know at the time what I was going to do with them, but knew someday I would use them.  I came home and did a few Google image searches for embroidery hoop crafts and the idea was born!  I wanted to use these hoops in Cason’s (at the time he was called Peanut) room.  Back in February, while tooling around the Blue Door Thrift Store and 9 months pregnant, I came across about 17 more hoops. I did a hoop swoop (could not help myself LOL) and grabbed them before anyone else could get them. Smile All said, I paid a total of $15 for 35 hoops, ranging in size from 3 inch – 14 inch. I wish I would have taken a picture of my huge hoop collection. Many people that came over to our house during that time would ask “what on earth are you going to do with all of those hoops???”.


I at first tried to find fabric and material that I liked at thrift stores and the remnants section of fabric stores, but was not finding exactly what I was looking for.  Prior to finding the hoops, I had purchased a quilt kit at Joann’s fabrics that I absolutely loved.  It is the Modern Collection Quilt Kit in Whimsical Dots Blue.  The regular price was $35.99 and I had a 50% coupon.  I found one on eBay today if you want to buy your own, I have no idea if Joann’s still has them in-stock.  The fabrics were all dot inspired, which went along with my theme for the baby’s room.  I was going to try my best to make a quilt for my baby boy.  LOL!  This was a huge feat considering I am a newbie seamstress.  So, after searching for various fabrics for my hoops, I decided to scrap the quilt idea and use the fabrics from the kit in my hoops.  It worked perfectly!


Here is the Quilt Kit picture:


There are many tutorials on how to put the fabric in the embroidery hoops.  I reviewed a few and in the end I cut many corners.  I popped the fabric in place, stretched the fabric as I tightened the hoops and then cut off the excess with scissors.  Most tutorials say to hot glue the fabric to the inner rim, but I was lazy and did not do that step.  Hopefully my fabric stays put.  I will let you know if any come loose. 

Over several weeks I worked on putting the fabric in place, and then this project came to a standstill.  I gave birth and any crafty projects were on the back burner.  Since Cason’s birth, I have slowly but surely trimmed the fabric and got them ready to be put on the wall.  Pete provided me with some very handy plastic shims to hang on the wall with the awesome 3m photo hanger tabs.  I will post in more detail about how I attached them to the wall later…

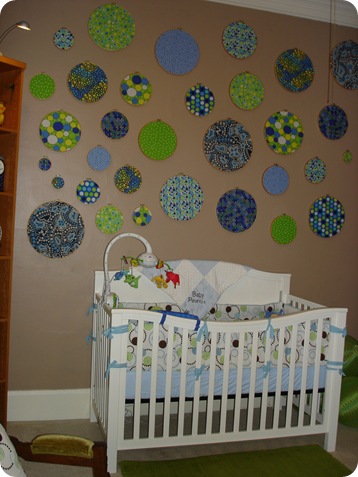
So last night, I finally got my tail up on the ladder and started randomly hanging the hoops.  I will more than likely tweak the layout of the hoops over time. It was hard to get on/off the ladder, try to place them, not have the same pattern next to or close to another hoop, etc.  Overall I LOVE it and more importantly, Cason cooed and gooed over them last night and this morning.  They hang right above his crib on the wall.  Way to go Mommy! 


Here are several more shots of my took-me-forever-to-complete craft project. 


007


008


009


010


Well, what do you think?  Did I mention that I LOVE it!  Every time I walk down the hall, I sneak a peak again and SMILE!  I love how it turned out!  Smile 


Toodles,


Signature


Dresser Facelift – Part 1 December 4, 2010

Hello Everyone,

I hope you are having a fabulous Saturday. Pete and I had a bit of slow start to our Saturday, but finally kicked into gear around 3pm today. We gathered our painting and prep supplies and started the process of a dresser facelift. This is our first DIY makeover project together and he was following my lead since I have been reading a ton of blogs lately on refinishing and painting furniture. Some of the blogs/posts I have read for inspiration include Bower Power, Centsational Girl, and Thrift Decor Chick. These ladies ROCK at fixing up thrift store furniture in need of some love and TLC!

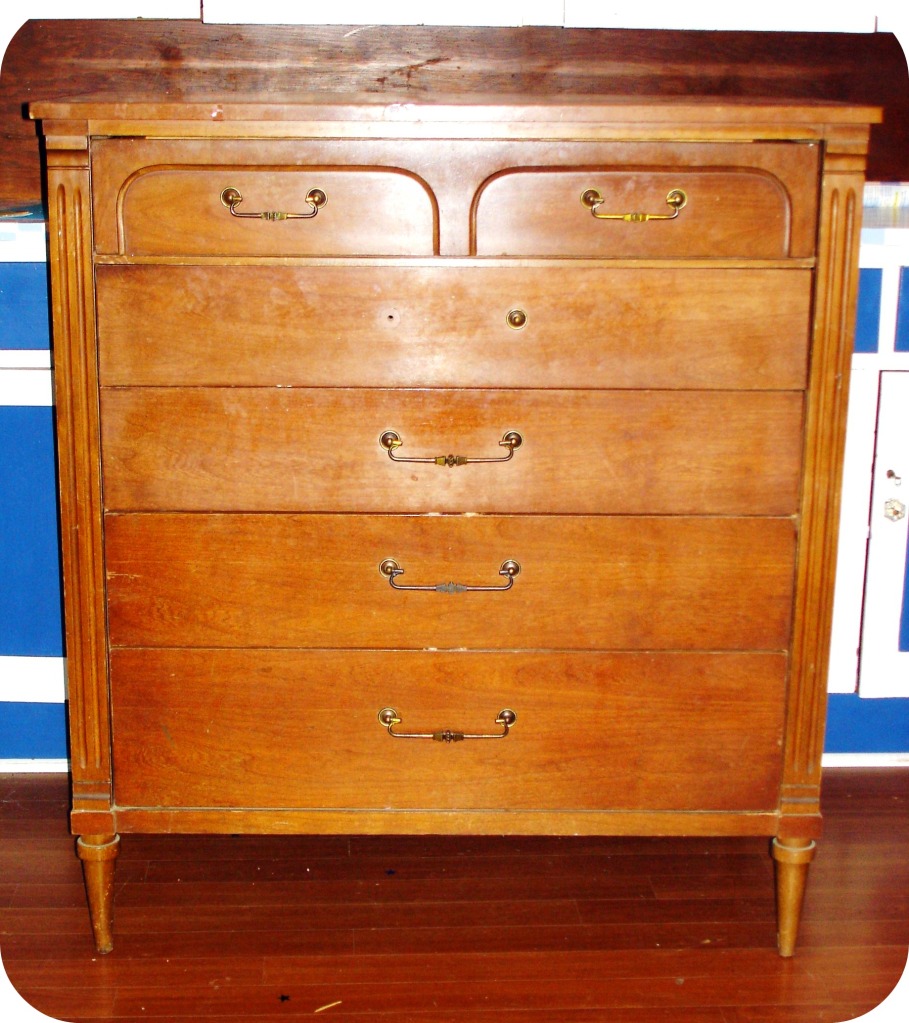
A few weeks back I came across this lovely dresser with a little bit of distressed look at my local Habitat Re-Store. I make at least a weekly trip to the Re-Store and eyed the piece for two weeks.

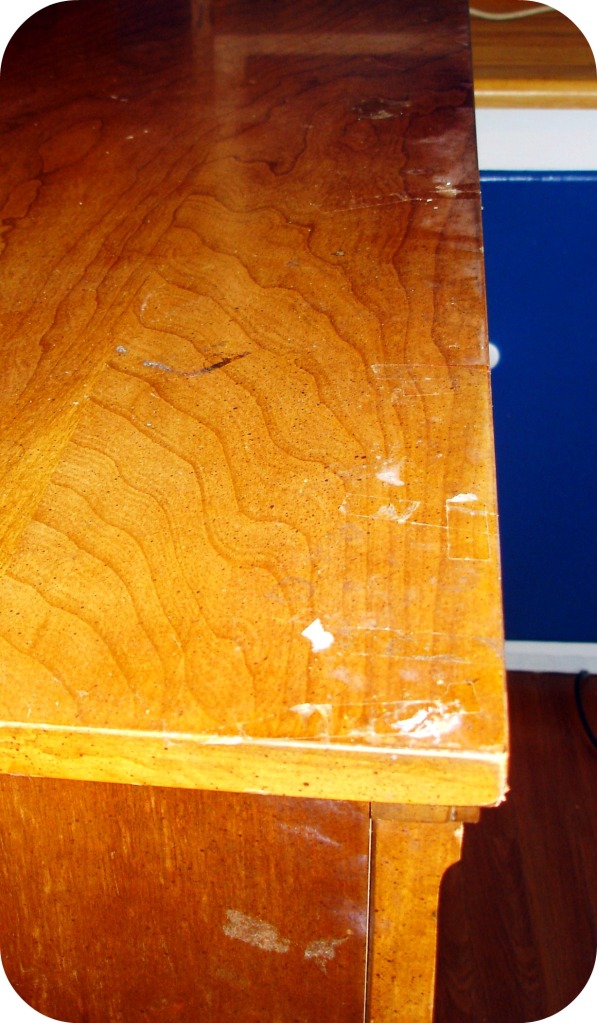
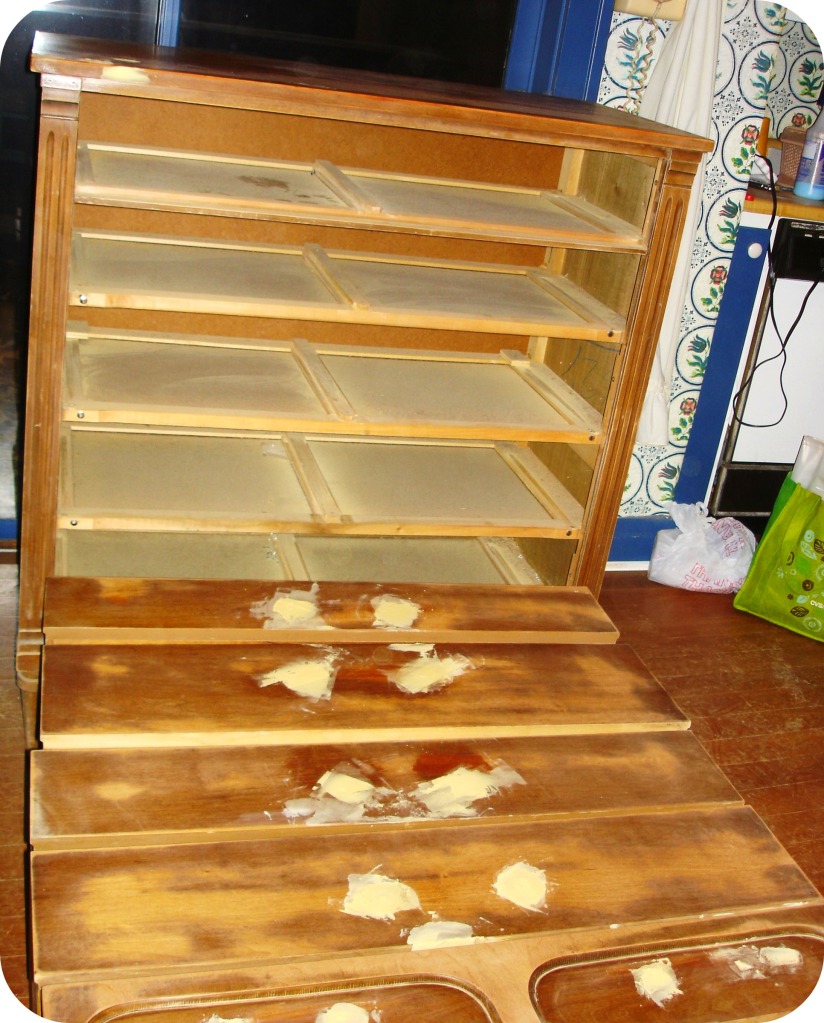
I finally decided to bite the bullet and ask if they could wiggle on the price. I purchased this dandy dresser for $45, they originally wanted $70. I love the clean lines on this dresser and think it will look great in our nursery for Baby Peanut. As you can see from the picture above it is missing one of its handles and in the picture below you can see some of the icky sticky stuff on the top of it.

Pete and I set out today to get the sanding done, handles removed, and wood filler applied. Tomorrow we will paint on a little oil-based primer. Here I am sanding the side of the dresser. Pete started on the drawer fronts. The picture is grainy due to the dust/sand debris flying in the air.

I used 120 grit sandpaper for sanding on my Black and Decker orbital sander. I must brag on Pete for a minute regarding the sander. He knew I was itching to start refinishing furniture and had heard me mention a few times some projects I had in mind. A few weeks back, Pete came across the Black and Decker sander at a yardsale for $5! It came with its carrying case and a plethora of sand paper refills of various grits. WAY TO GO HUBBY! The previous owners had added a handle to the sander to add a little more control to the sander. It works perfectly!

So here is the dresser after Part 1.

We have sanded the dresser and drawer fronts, removed the handles, and filled in the holes. To fill in the holes, we used Elmer’s Wood Filler, like the one pictured below. It is paintable and stainable and should work great. We purchased the wood filler from Lowe’s, the 32 ounce size for $7.19. I opted for the larger size since I know we will be using this as I have many furniture and picture frame projects up my sleeve. We used a tad bit of mineral spirits on the top of the dresser to remove the icky sticky stuff. Worked like a charm!

So that is our progress for Day 1. Tomorrow is another round of sanding to get a nice smooth surface where the wood filler was applied, a good wipe down to remove all the dust particles, and then at least one coat of oil-based primer. We had to call it quits for the evening – it is football time. Go AUBURN!

I am thinking about painting the dresser white, but welcome input from my lovely readers. Let me know what you think. We are painting the nursery a green apple color and will have white gloss trim. I am also unsure of what drawer pulls I am going to use. Since we are missing one handle I will have to replace them. I am undecided if I should use one handle/pull per drawer in the middle or if I shoud use two pulls, one on each side. Let me know what you would do! More to come tomorrow!

Toodles,

~Iris~


Thrift Stores, Thrift Stores, Oh How I Love Thee November 18, 2010

Hello Thrifty Friends,

As usual I made my rounds this week to various thrift stores in my area: Habitat Re-Store, St. Vincent de Paul, Loaves and Fishes, and Salvation Army. Yes, I went to all 4 of them…I told you I was addicted. Well I went a little crazy, but as you know thrift stores can be hit or miss so when you are on a roll why stop? Here are a few (ok a lot) of pictures of the treasures I found this week.

First Baby Peanut stuff:

A few (ok more than a few) cute outfits. $1 each at Loaves & Fishes:


Two Baby Playmats $1 for the 1st one picture from Loaves & Fishes; $2 for the other one from Salvation Army

A Fisher Price Music Maker Toy (it works) $5 from St Vincent De Paul:


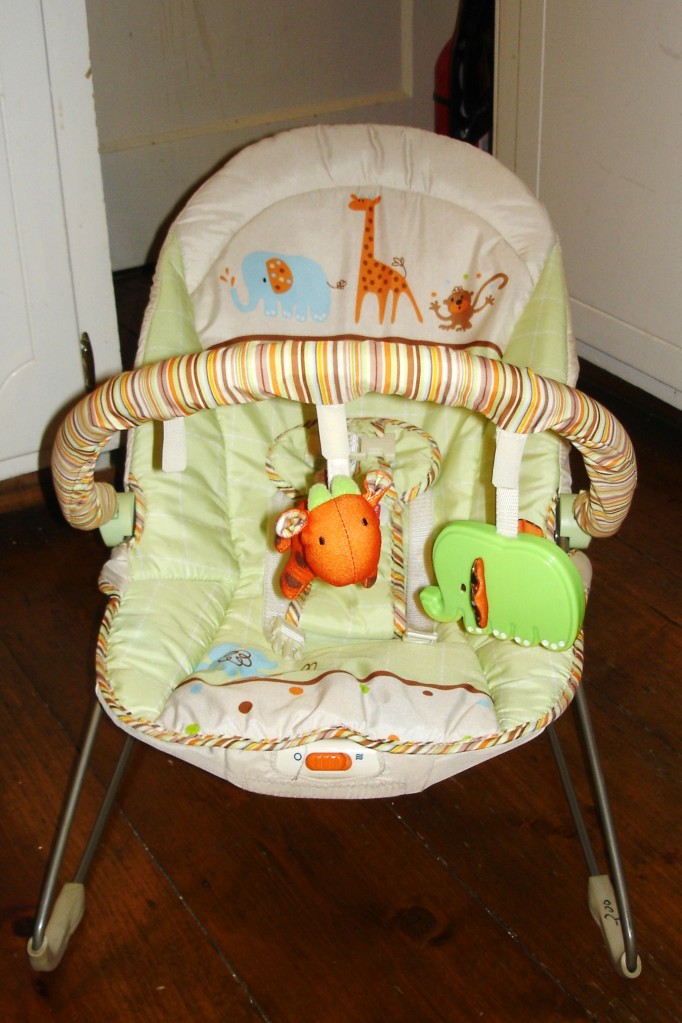
And my best Baby Peanut purchase this week:  Fisher Price Vibrating Chair (only missing the hanging toy monkey)…$3.  Yep, $3, and it works!


Next came a lot of pillows, fabrics, and linens:

2 Green Pillow covers (pillows included) pictured in the middle for $3/each and the yellow and green pillows on each end $.50 each.  These will be used in the Spring. 


4 Burgundy Pillow Covers – remember the green and yellow pillows – they are now in these lovely Burgundy pillow covers.  $2/cover.  $8 for new-to-me pillows!  We already had the brown/red pillows.  The brown throw on the right was also a $1 purchase this week.


Some more pillow covers:  2 White covers ($.50 each) and 2 cream linen covers $2 each).  I don’t have pillows to fit these…yet. 🙂


Now moving on to Bed Linens:

2 White Pillow Shams with matching Bedskit (full size).  $2 for ALL! 


2 Khaki Egyptian Cotton Pillow shams and one 1 multi-colored striped sham, $1 for each


Now for some window treatments.  2 long (I have not measured them yet) window treatment panels.  Not sure if I will use these, but they will serve as a great template for me if I decide to attempt to sew my own window panels one day.  $1 for each.  I also bought 4 window sheer curtains but did not photo those.  $.50 each.


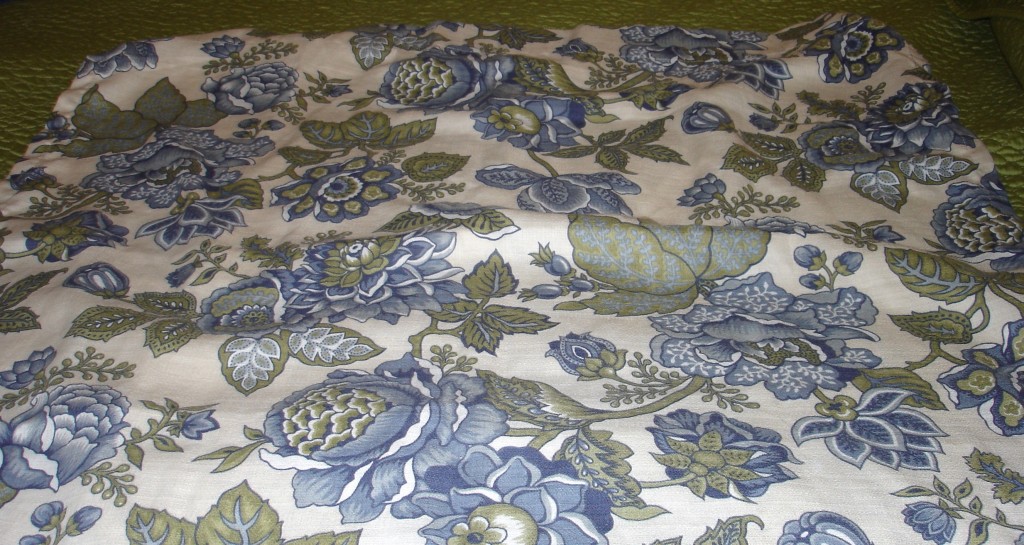
And some fabric:  Lovely red wine color (silky type of fabric) and creamy white  (linen like fabric).  $2.50 per fabric roll.  Over 8 yards on each roll!


Now for some items for the kitchen and around the house:

I collect old canning jars, particularly the old blue/turquoise Ball Mason jars.  I have almost 40 of them.  I saw these old Atlas Fruit canning jars with the glass lids for the RIDICULOUSLY low price of $2.50 for all 5 of them.  Even though I normally don’t buy the clear ones, the price was too good to pass up! 


The basket will come in handy and the banana holder has been on my “keep an eye out for” list for a while.  $.50 for the basket and $.75 for the banana holder. 


Two lovely matching crystal lamps.  I will be painting the brass parts a lovely shade of white more than likely.  $15 for the pair!  Just need to look for some shades now!


I have a weakness for Blue & White china/pottery pieces.  When I see them from range in a thrift store it makes my heartbeat increase, and I have to all but run over to them to stake my claim.  I once left some blue and white china pieces on a shelf and headed to the front of the store to get a shopping cart only to go back and find they were gone!  #1 rule – always get the cart from the get-go and #2 if for some reason you end up cartless, load your arms up with your treasure then go find a cart or box or something to put them in.  Anyways, I digress.   I got these lovelies for $1 for each cup/saucer set and $1 for each side plate.  🙂 Score!


A new non-stick grill basket.  We have one of these already, but after a year or two of being used on the grill, it begins to get a bit icky.  Now we have a new one.  $.75.  These lovely grill baskets are normally are at least $5-$7 in stores.


Three more rectangular/square vases to add to my collection.  $1 each.  I now have 4 of each size.  4 square ones and 4 slender rectangle ones.  I like to group them together.  When I see these again I must remember that I really don’t need another one, but they are do darn cute and useful.


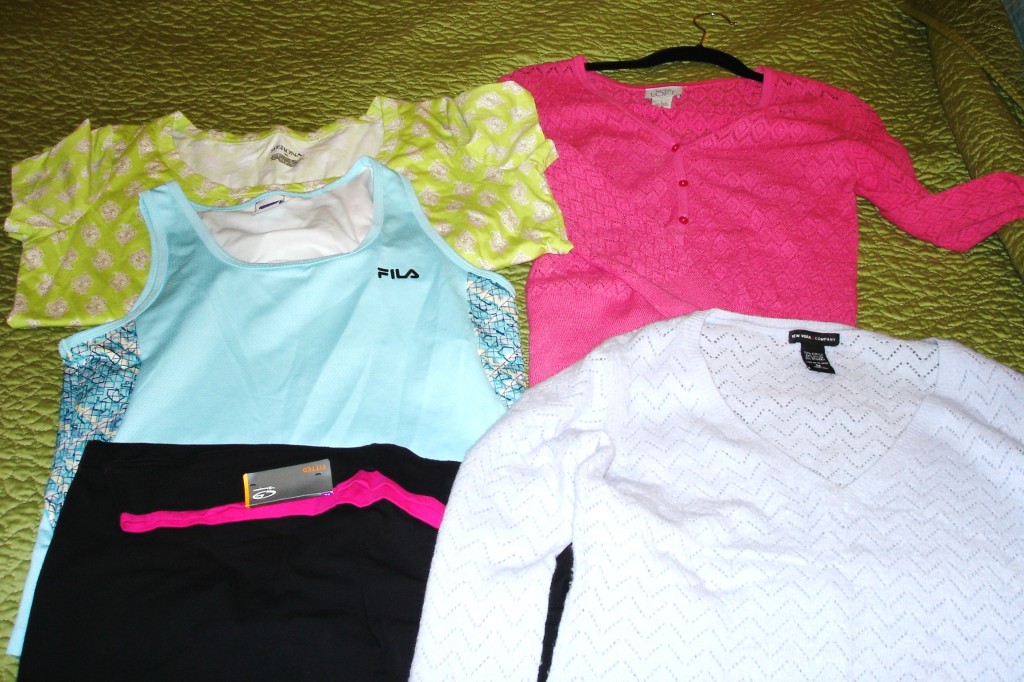
And last, I know you have got to be wondering what else could I possibly have bought!  I few items for me…clothes!   Exercise capri pants by Champion still with the tags on them $2.50; a lovely pink cardigan by Ann Taylor $1; a nice light blue sweather by New York Company $1; a green print maternity shirt from Target $1; a FILA exercise sports bra/top $1.


There are two other items that I purchased – one I cannot tell you about because it is a gift for my sister, Susanna, for Christmas.  The other item is HUGE and I could not fit it in the car.  We are picking it up tomorrow with the trailer.  I will post pictures of that purchase tomorrow!  It is BEAUTIFUL!  🙂 

So sorry if this post was insanely long, but this week was a good week at the thrift stores and I was on a roll.  If you are not a thrift store shopper I highly recommend you try it out.  There is a TON of good stuff there.  Oh and yes, I did take my required box of donation items…in fact I took 3 boxes. 

Find any good thrifty treasures this week?  I would love for you to share your findings with me! 

Toodles,
Iris