I am so excited to finally be able to share this craft project that has been a long time in the making.
Last fall I came across about 18 various sized embroidery hoops at Habitat Re-Store. I did not know at the time what I was going to do with them, but knew someday I would use them. I came home and did a few Google image searches for embroidery hoop crafts and the idea was born! I wanted to use these hoops in Cason’s (at the time he was called Peanut) room. Back in February, while tooling around the Blue Door Thrift Store and 9 months pregnant, I came across about 17 more hoops. I did a hoop swoop (could not help myself LOL) and grabbed them before anyone else could get them. ![]() All said, I paid a total of $15 for 35 hoops, ranging in size from 3 inch – 14 inch. I wish I would have taken a picture of my huge hoop collection. Many people that came over to our house during that time would ask “what on earth are you going to do with all of those hoops???”.
All said, I paid a total of $15 for 35 hoops, ranging in size from 3 inch – 14 inch. I wish I would have taken a picture of my huge hoop collection. Many people that came over to our house during that time would ask “what on earth are you going to do with all of those hoops???”.
I at first tried to find fabric and material that I liked at thrift stores and the remnants section of fabric stores, but was not finding exactly what I was looking for. Prior to finding the hoops, I had purchased a quilt kit at Joann’s fabrics that I absolutely loved. It is the Modern Collection Quilt Kit in Whimsical Dots Blue. The regular price was $35.99 and I had a 50% coupon. I found one on eBay today if you want to buy your own, I have no idea if Joann’s still has them in-stock. The fabrics were all dot inspired, which went along with my theme for the baby’s room. I was going to try my best to make a quilt for my baby boy. LOL! This was a huge feat considering I am a newbie seamstress. So, after searching for various fabrics for my hoops, I decided to scrap the quilt idea and use the fabrics from the kit in my hoops. It worked perfectly!
Here is the Quilt Kit picture:
There are many tutorials on how to put the fabric in the embroidery hoops. I reviewed a few and in the end I cut many corners. I popped the fabric in place, stretched the fabric as I tightened the hoops and then cut off the excess with scissors. Most tutorials say to hot glue the fabric to the inner rim, but I was lazy and did not do that step. Hopefully my fabric stays put. I will let you know if any come loose.
Over several weeks I worked on putting the fabric in place, and then this project came to a standstill. I gave birth and any crafty projects were on the back burner. Since Cason’s birth, I have slowly but surely trimmed the fabric and got them ready to be put on the wall. Pete provided me with some very handy plastic shims to hang on the wall with the awesome 3m photo hanger tabs. I will post in more detail about how I attached them to the wall later…
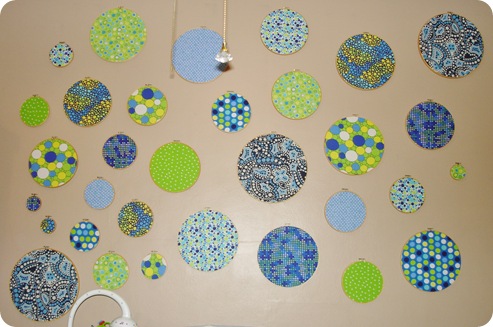
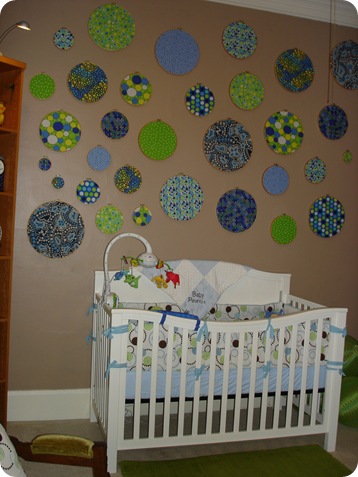
So last night, I finally got my tail up on the ladder and started randomly hanging the hoops. I will more than likely tweak the layout of the hoops over time. It was hard to get on/off the ladder, try to place them, not have the same pattern next to or close to another hoop, etc. Overall I LOVE it and more importantly, Cason cooed and gooed over them last night and this morning. They hang right above his crib on the wall. Way to go Mommy!
Here are several more shots of my took-me-forever-to-complete craft project.
Well, what do you think? Did I mention that I LOVE it! Every time I walk down the hall, I sneak a peak again and SMILE! I love how it turned out! ![]()
Toodles,


Oh, I think it looks incredible! Such a happy place for baby!
Thank you so much for sharing!
xoxo,
Jen
Wow! It gives the room an airy, whimsical feeling, doesn’t it? !
Great job! Looks great!
Thanks, Leesa! I am quite proud! Hope you and your two sweet grandbabies are doing great! 🙂